The DocAssist Batch Processing Tool allows you to:
- Create a bundle (ie batch) of documents by selecting a list of documents and assigning them to a batch. Currently, the source and created documents must be saved into a version of iManage. An example scenario could be initial leasing documents, acknowledging client instructions and requesting lessor/lessee information.
- Process a batch of documents all at one time with a selected Matter (ie iManage Matter Workspace) and Author.
- Set particular documents to run multiple times based on a DocAssist Group count (if set up in the source document).
- Select documents in the batch without having to process the entire batch.
- Open completed documents open directly from iManage WorkSpace or via the History tab on the DocAssist Batch Tool.
Open the Batch Tool
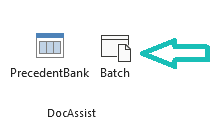
- To create a Batch, in Word, on the Home menu, select Batch on the DocAssist grouping.
- The DocAssist Batch Tool will appear as below.
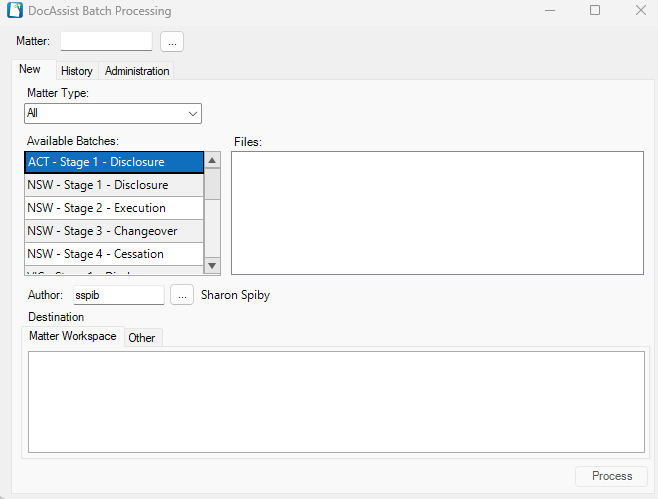
There are three tabs:
- New – allows selection of a matter type, batch, author and destination for documents created
- History – shows the history of all batches (when a matter no. is selected)
- Administration – allows the DocAssist editor to create, edit or disable matter types and batches (this tab only appears for users set up in the DocAssist database as DocAssist editors). See DocAssist Editor UserRoles for instructions on how to enable a user to have access to the Administration tab
Create a Batch Name
On the Administration tab, scroll down to the end of the available batches and click in the empty row that says “Click here to add a new row“.
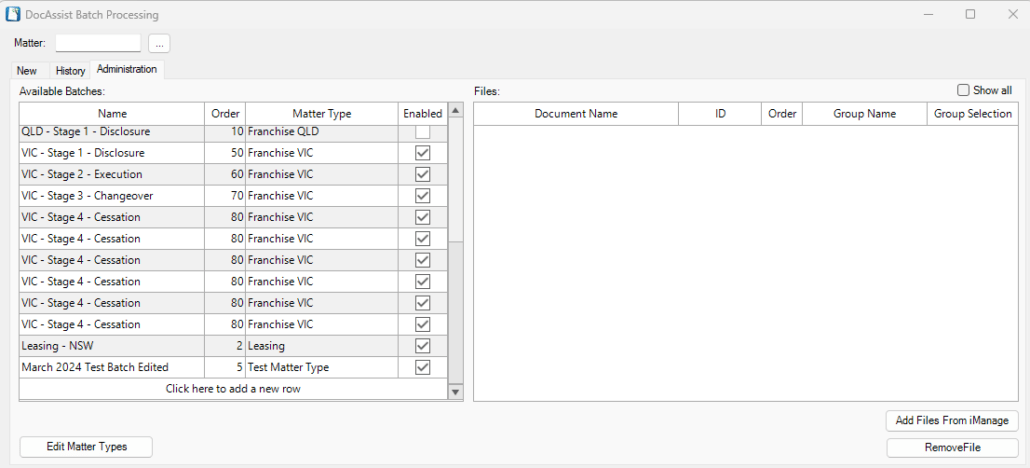
- Enter the Name of the Batch e.g. Leasing – NSW
- Enter the Order number (this dictates where the batch will appear in the New tab of available batches)
- From the dropdown list, select the Matter Type to associate the batch against. If you need to create a new Matter Type see instructions below
- By default a new batch is checked as Enabled, uncheck if you would prefer users not to see the batch type until the batch documents have been finalised
Add documents to Batch Name
On the Adminstration tab:
- Select the Batch Name from the Available Batches and select the button Add Files From iManage
- Select an iManage document to link to the batch (only one document can be selected at a time)
- Continue selecting the appropriate iManage documents using the Add Files from iManage button
- If required modify the document Name by clicking into the Name. Note this does not change the name of the source document in iManage
- Enter the Order number (this dictates where the document will appear in the New tab when the batch name is selected)
- Type in a Group Name (plural ie Lessees) if the document is required to run more than once and the relevant group automation has been added to the source document
- Group Selection is set to 0 by default (this allows unlimited copies of a document to run) if set above 0 the document will run the required times only ie 4 will create only 4 documents. Note Group Selection is only enabled if a Group Name is specified and the relevant group automation has been added to the source document

Renaming/Modifying a Batch
To rename a batch, select it from the list on the Adminstration tab and click into the row to rename or modify the other attributes.
Deactivating a Batch
To deactivate a batch, select it from the list on the Admintration tab and click on the Enabled checkbox to remove the tick.
Matter Types
Matter Types need to be set up before creating a new batch (if a suitable Matter Type does not already exist). Matter Types allows users to filter the DocAssist Batch Tool to show only the batches relevant to the area of law for the client matter.
Creating a Matter Type
To create a Matter Type, select the Edit Matter Types button on the Administration tab.
Renaming a Matter Type
To rename a Matter Type, select the Edit Matter Types button on the Administration tab. Select the Matter Type Name and click into the row to rename.
Deactiviting a Matter Type
To deactivate a Matter Type, select the Edit Matter Types button on the Administration tab. Select the Matter Type Name and untick the Enabled checkbox (ensure there are no Batch Names set up against this matter type first).
Running a Batch
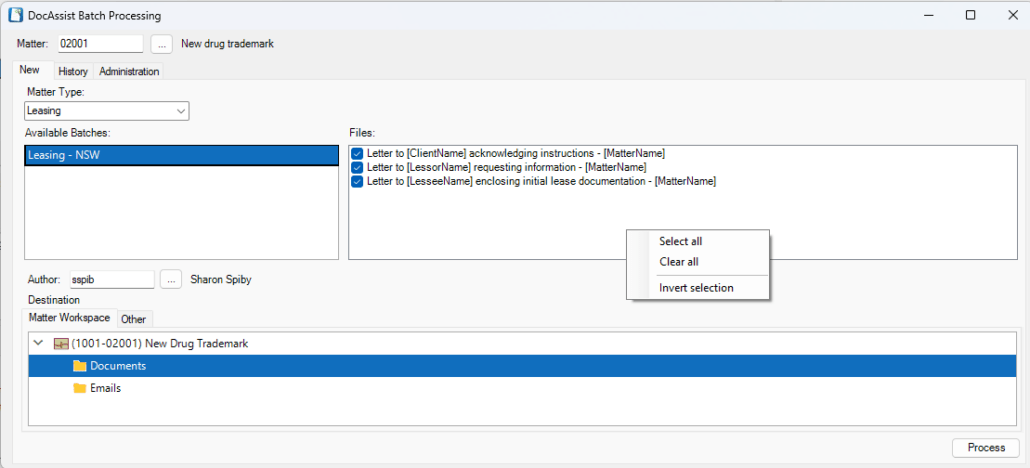
To run a batch, select the New tab.
Select in the following order:
- The Matter – select an iManage matter as data source for documents (this box appears above the New tab)
- Matter Type – select a Matter Type to filter available batches
- A Batch name (from the Available Batches shown)
- The Author
- Destination
- Matter WorkSpace tab – The iManage matter workSpace for matter selected is shown by default, a subfolder of this workspace can be selected for the destination
- Other – allows you to search for an alternative workspace in iManage ie a personal workspace
- Process – select to run the batch
Note: Right mouse click anywhere on the Files section on New tab (before selecting the Process button in step 6 above) to change the selection of documents using Select all, Clear all or Invert selection.
As each document is processed it will be saved to the destination folder selected in Step 5 above.
Once the batch processing is complete, a message will appear to indicate that it is finished.

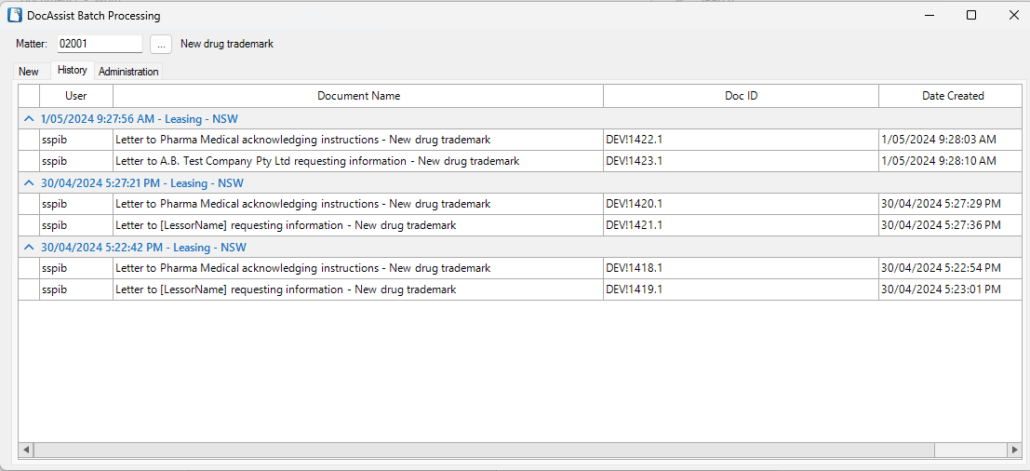
Batch History
The History tab provides a record of batches created against a matter and also allows quick access to the iManage documents created by double clicking on each document. The History tab will appear autmatically once a batch is completed. To check the batch history of a matter when not running a batch ensure the matter is selected at the top of the DocAssist Batch Process dialog for the history results to appear. If there is no batch history for a matter the tab will only show the header row.
The History tab on the DocAssist Batch tool provides a record of:
- Each batch name that has been run against a matter
- Date and time the batch was commenced
- The user who created the batch
- iManage document name and document number
- Date and time each document in the batch was created